The SIGA Series: Hazel Thorn's introduction to crimp and seam raising with Rauni Higson
The Student Internship Graduate Award (SIGA) series, an ongoing blog with the participants of SIGA who detail their experiences on the year – long programme where young makers train with master craftspeople. In this installment, Hazel Thorn shares more on her placement with silversmith Rauni Higson, including, seam and crimp raising and preparation for Goldsmiths' Fair.
Introduction to Crimp and Seam Raising
During a fantastic ten weeks with Rauni Higson I have been given a huge amount of support and encouragement, and of course knowledge and improved silversmithing skills. All of this has in turn led to many exciting new plans for my work. I learnt a great amount, both about the many techniques we covered and more generally. I’m very grateful for a lot of good advice about running a workshop and a business, maintaining creative development, and taking care of yourself as well!
During the middle of my SIGA placement, we completed my introduction to crimp-raising. I made an oval sample vessel in copper, to practice the technique on something trickier than a circle. There are several extra considerations with an oval, such as raising some areas in more than others, using different approaches and tools for the straighter sides and the tightly curved ends. Crimp raising is particularly effective when raising ovals and other complex forms, which I would like to introduce into my work.
Then we moved on to seam raising. This was one of my main plans for the time with Rauni, and it was thrilling! As well as being a useful technique to learn in general, it is highly relevant to my work in mixed-metals. The fused sheets I make can be raised to some extent, but not far enough to create a tall vessel from a flat disc. I have been enjoying making wrapped cylindrical vessels using this material, but now want to branch out into more rounded forms as well.
Seam raising involves making a cylinder or cone and then raising some areas inwards (and stretching some areas slightly outwards) to create the desired final form. The first thing to do is plan what form you intend to make, then work out what shape of cone will match it best and draw out a template for the metal sheet needed to produce this cone accurately.
One of the most surprising tips was that before forming the cone, you should use the corner of a square file to gently caulk both edges that will meet to be soldered together. This creates a much stronger join, and an expert in the technique will have very little if any fixing to do as they go along. Being fairly new to the process however, I did have to make some repairs during raising. This was a learning experience and so not to be regretted - but I look forwards to practicing seam raising a great deal and eventually encountering fewer mishaps!
Learning seam raising has opened up huge possibilities for my work, and has also improved my skills in techniques such as stick-feeding solder and the planishing of complex forms. I made three copper vessels to practice all steps of the seam raising process, and to experiment with different forms and finishes. I added extra solder to two of these copper pieces, so that I can also use them to experiment with some different patination techniques.
Preparation for Goldsmiths' Fair
In the final block of the placement, I worked on two silver pieces which I will be exhibiting in Goldsmiths Fair (week one) this year. I will also be making some new work in mixed-metals to accompany these objects. Using fused mixed-metal will undoubtedly produce new challenges, which is why it is so important to learn on simpler metal first so that I can get the hang of a new technique in something more easily predicted. Making objects in silver alone is also central to new developments in my work, as although I will definitely be continuing to use mixed-metals, I want to introduce more variety in the types and appearances of objects that I make.
My intention is to have a coherent display of work incorporating patterned mixed-metals pieces alongside items in silver with similar patterns achieved in different ways (such as chasing), and also objects which have complementary forms to the mixed-metal pieces but in contrasting bold plain silver.
Making a seam raised piece in silver, and a hot-forged silver serving spoon, allowed me to hone my new skills and pick up tips which are only applicable when working in silver, such as dealing with firestain. As with a lot of the key skills in silversmithing, many experts have slightly different approaches, and so it is always useful to work alongside and have conversations with as many knowledgeable people as possible. For example, I had never before encountered the trick of using a piece of thin white paper to create diffuse light, whereby fire stain and solder show up clearly.
Working with silver instead of strongly patterned mixed metals has led me to consider much more subtlety in my approach, as on plainer metal even a gentle effect from hammer blows can show up beautifully. I am enthralled by the textures which are created during raising and forging, and plan to work with some bold textures as well - a bridge between different areas of my new work. As with my mixed metal work, I find it incredibly satisfying when the decorative finish on a piece tells the story of how that object was made. Hot-forging with various shapes and weights of hammer creates a dynamic effect which matches this energetic technique well.
Tools and maintenance
Throughout my time with Rauni, we also did some work on tool making and maintenance. Being able to make and adapt your own tools is extremely useful for a silversmith, and of course keeping everything in good condition is essential. As well as brushing up my skills on stake and hammer cleanup, we worked with steel, wood and plastic to make the forming tools used for anticlastic raising. Making these tools with expert guidance helped me to understand the technique in more depth - and now I have what I need to continue with some anticlastic adventures back in my own workshop.
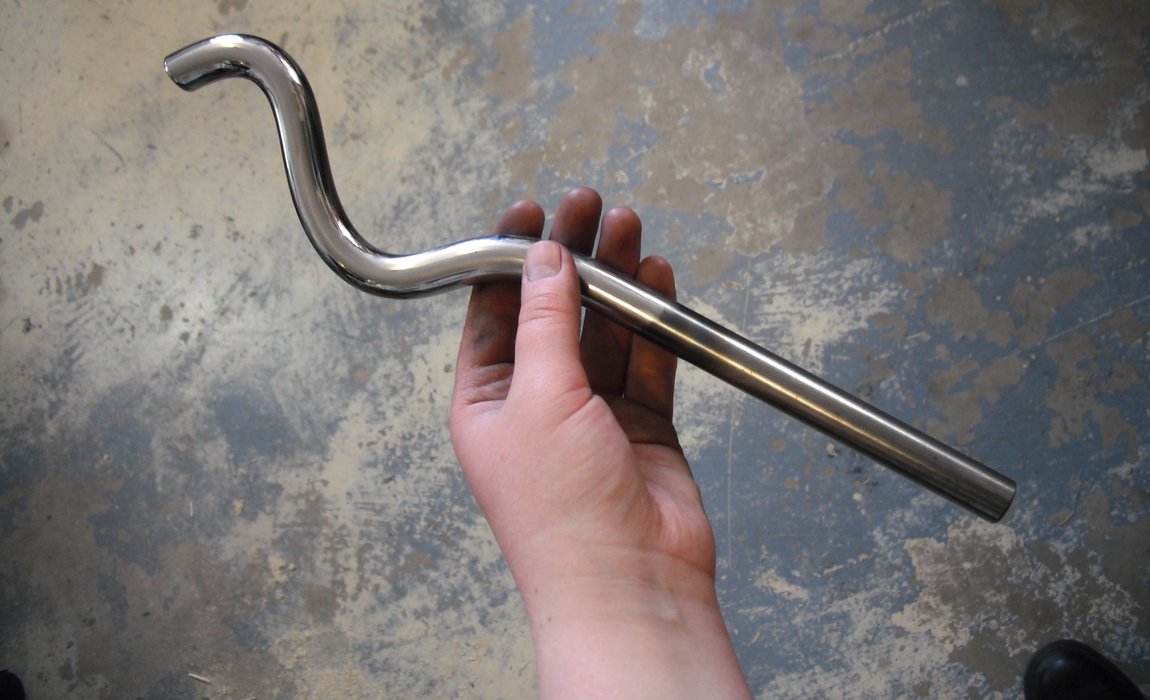 Anti clastic stake finished
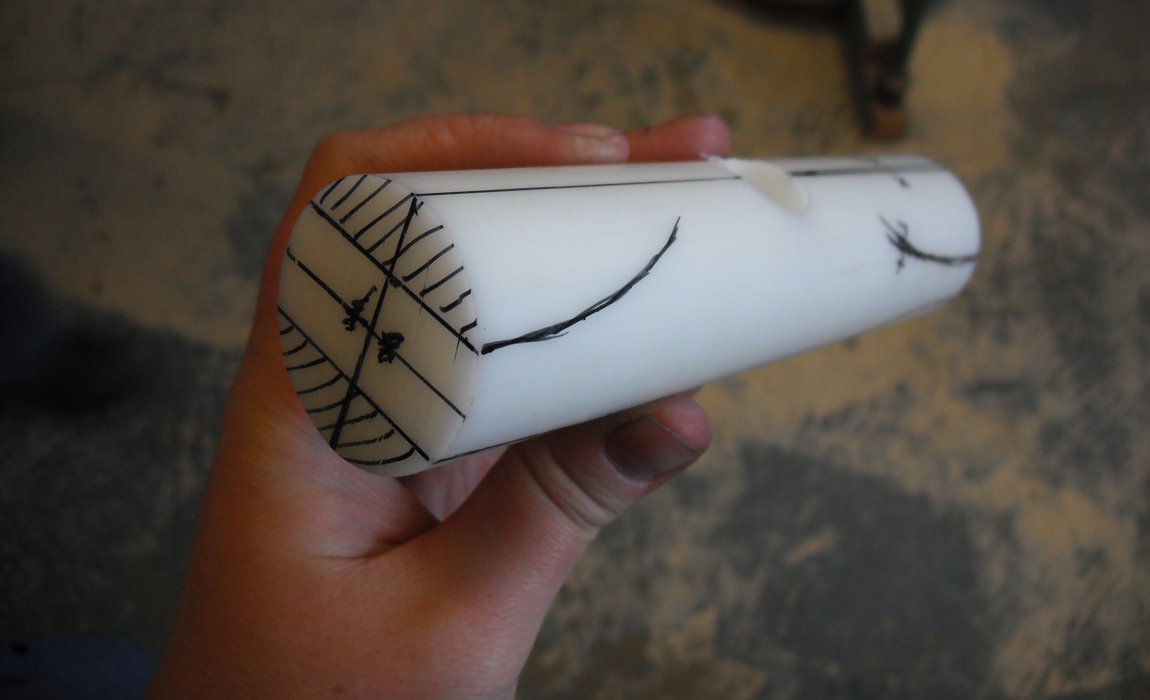 Plastic mallet in progress
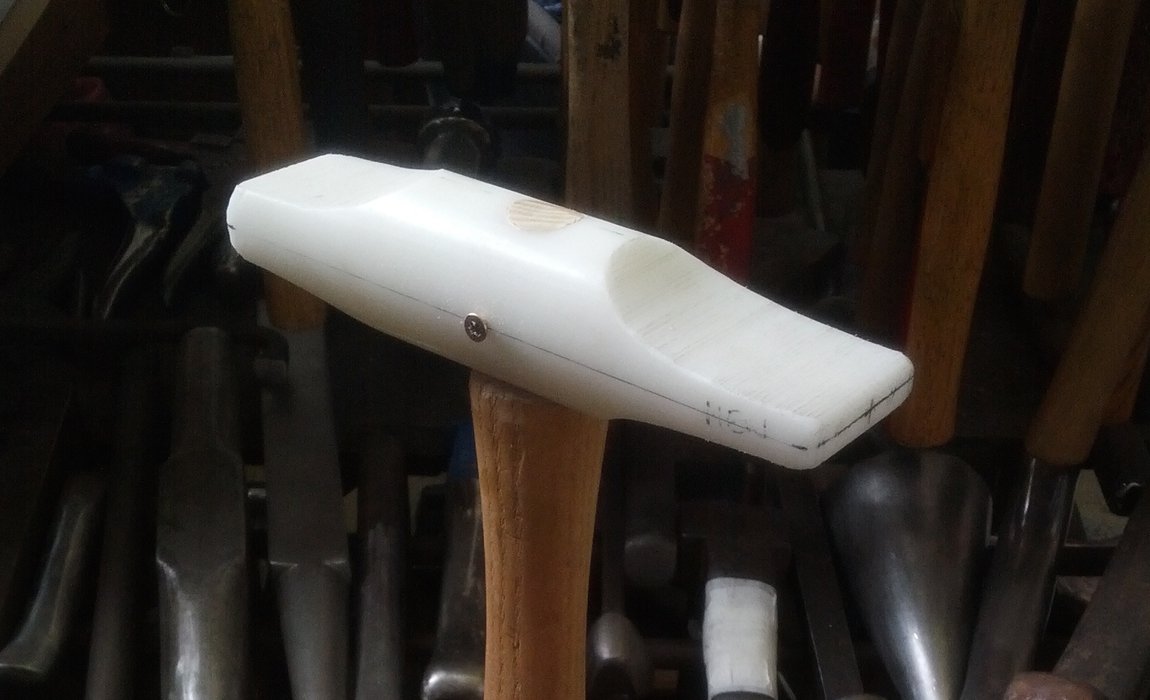 Plastic mallet finished
It was also fascinating learning how to deal with rusty stakes and hammers. This is often the condition in which you can obtain good quality but neglected old tools, so knowing how to restore them is vital. There is a better and cheaper alternative to the commercially available solutions to remove rust… tea! You make up an incredibly strong brew by leaving dozens of (used) teabags in a bucket of boiling water, and submerge the rusty items for 3 or 4 days - by which time, incidentally, it smells strongly of blackcurrant… The rust turns into a slippery black coating which can be scrubbed off easily. It is then very important to thoroughly dry and oil the metal immediately, before it gets a chance to start developing rust again. This treatment stops the rusting process, and the tools are now ready for grinding / filing, sanding, and polishing. This knowledge is going to be extremely useful as I work on expanding my range of equipment.
Interested in our courses? Find out more.